Showing posts with label food. Show all posts

Tuesday, September 17, 2013

A Cookie By Any Other Name Is Inferior. And not as Funny.

As promised, the Snickerdoodle recipe.  (Isn't that a funny name for a cookie?)

As usual, I just can't give you a recipe.  There has to be distractions, commentary to entertain, and tips to help you make the best darn cookie ever invented.  Basically, I write in a way which prevents you from simply pushing "print page" to get the recipe.  :)

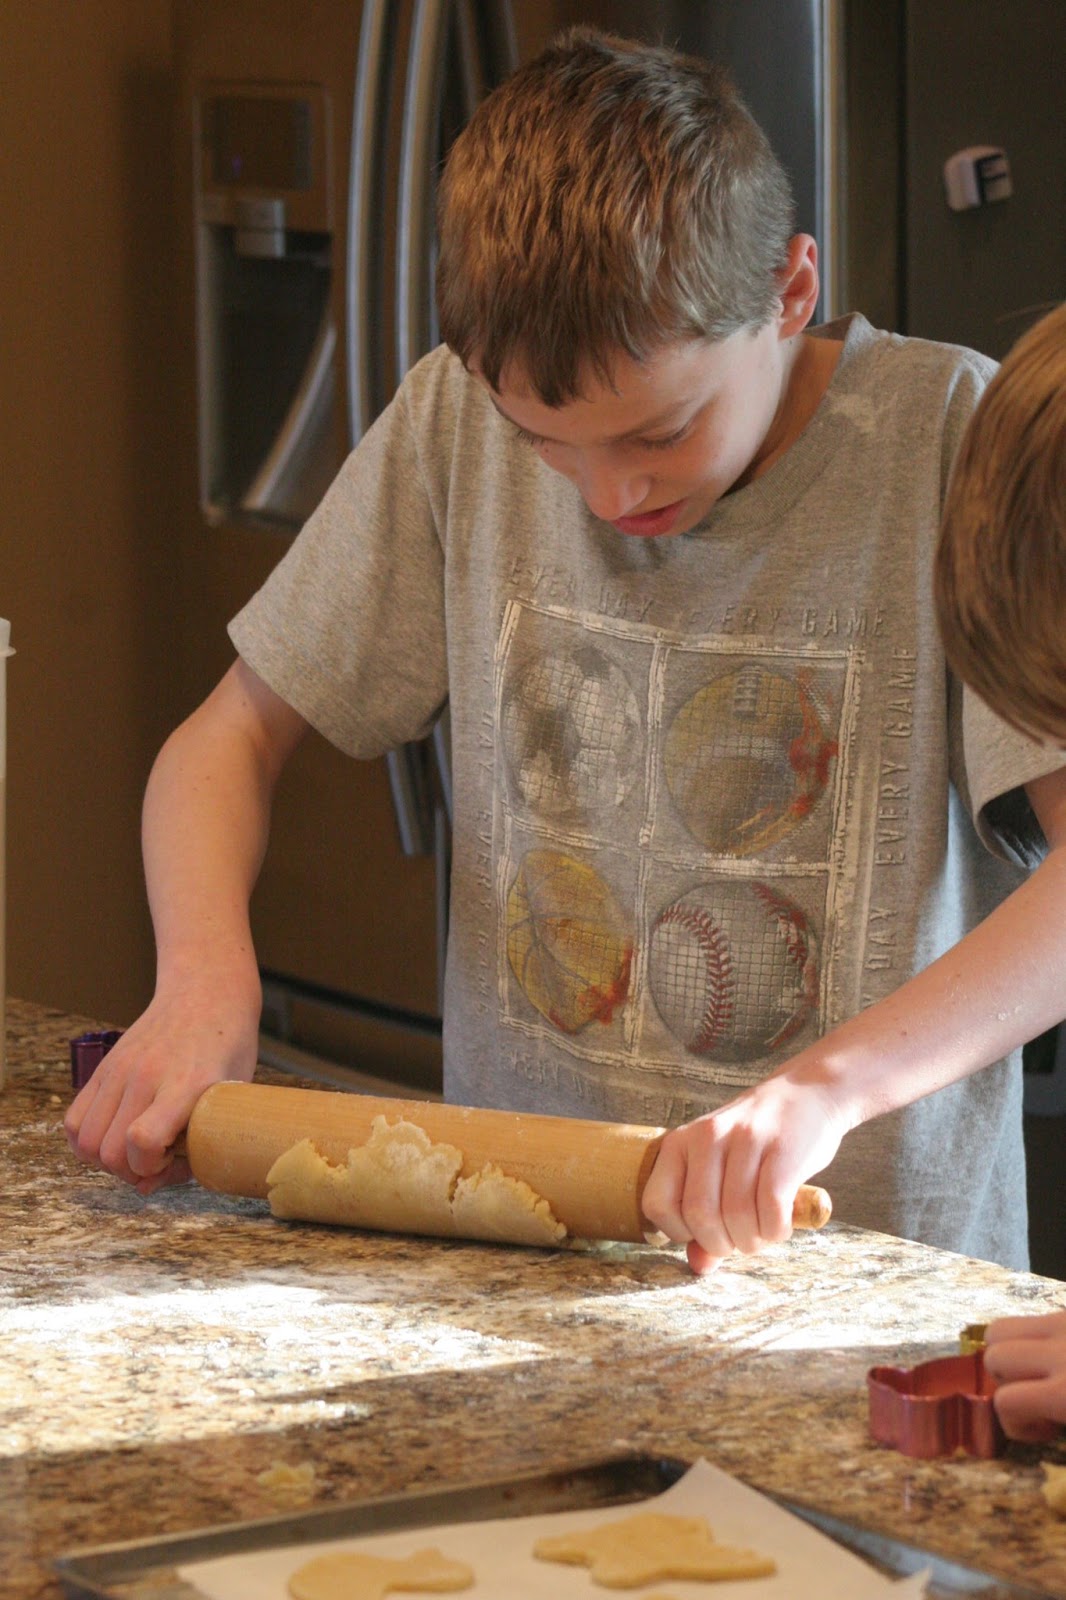
I make these more than any other cookie, not just because they taste delicious, but because they are the PERFECT cookie to make with little kids.  Cuckoo and I made them last week, because Giant wanted to take them into his class for his birthday.  Buttercup saw these photos and said, "Oh, I remember making those.  I loved rolling the cookies in the sugar!"

Make them with little children.

I don't care if you have to pull one off the street.  Involve a child.

Onward...

The original recipe is from my mom.  My tips are in italics.

Mix the following:

1 cup butter
1 1/2 cups sugar
2 eggs

Sift:  Ha!  I don't own a sifter and have never sifted in my life.

2 3/4 cup flour
1 teaspoon baking soda
2 teaspoons cream of tarter
1/2 teaspoon salt

Slowly add dry ingredients to the wet, mixing as you go.  The last half cup may kill your mixer, seeing as how this is one thick dough.  If your mixer starts to smoke, unplug it and finish mixing with a spoon.)

Cover and chill in refrigerator.  I usually make the dough before going to bed, then bake the cookies in the morning, but you and the cookies can chill for as little as 2 hours.


Preheat oven to 400 degrees F.
 
Stir together 2 Tablespoons sugar and 1 Tablespoon cinnamon on a small plate.
 
Roll the dough into balls the size of walnuts.  I use a spoon to scrape the dough out of the bowl, then simply roll it around between my hands to round it out.   (Like you couldn't have figured that out.)
 
 
THIS IS WHERE THE KIDS COME IN!!!!
 
 
Have the kids roll the balls in the cinnamon-sugar until they (the balls, not the kids) are completely covered.


Place the cinnamon-sugared balls onto a parchment paper-lined cookie sheet a few inches apart.


While taking photos of cookie sheet, realize the early morning sun is casting a lovely shadow on the golden wall of the kitchen.


Bake the cookies for 8-10 minutes.
 
Go back to taking photos of the flower while they bake.
 
The photo is from Phoenix.  He is a Boy Scout and last week earned his next level in scouting, Life.  The Boy Scouts are very much about honoring their mothers, so whenever a boy reaches a new level, he gives his mom a pin.  At Life, she also gets a rose and a promise to give her the other 11 out of the dozen when he gets his Eagle (the next, and highest, level).

 
Then get back to making cookies.
 
WARNING!!!!!
 
Your child helper will very likely have licked his fingers after the last cookie went on the cookie sheet before going in the oven.  You will want to wash his hands between each and every tray!!!
 
After (usually) 9 minutes, the cookies will appear dry, but not brown.  Take them out of the oven.  I leave them on the stovetop (burners off!) on the cookie sheet for another minute.  The cookies will deflate a bit and finish their cooking process on the stovetop.
 
 
Sometimes, as I put the cookies in the oven, they roll a bit.  The cookies will run together, but who the heck cares?  They still taste delicious.  And show that they are homemade.
 
Move the cookies to a cooling rack to cool completely before putting them in a storage container.
 
 
Or in your mouth.
 
He's saying, "This is the best cookie I have ever had!" 
 
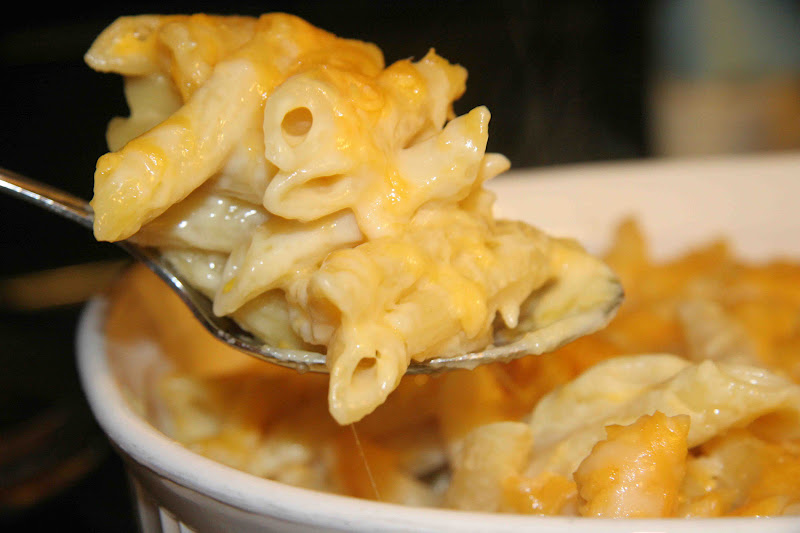
This recipe made about 4 dozen cookies.
 
Enough for each of Giant's classmates, teachers, siblings, parents, and soccer teammates to have a cookie.
 
They were begging for more.
 
Because these cookies are THE BEST!
 
Let me know if you try them.
 
Have a lovely day!


Monday, April 15, 2013

Meatloaf

Not the singer Meatloaf.  I never met him.  Though I did like that one song.

I made meatloaf for dinner a few nights ago.  I ate with the kids who had soccer that night, while Hubby ate with the rest of them.

The next day, Turken and I had this conversation:

Me:  Would you like some leftover meatloaf for lunch?

Turken:  No.  I didn't like it.

Me:  I'm guessing you didn't even try it. 

Turken:  Yes, I did.  I liked the meat but not the loaf.

Me: 

I couldn't breathe, let alone talk, with all of the uncontrollable laughter I was doing.

Once calm, I called Hubby.

He had some 'splainin' to do.

The rest of the story:

At dinner, Turken continued to pepper Hubby with the typical questions a preschooler asks when he is presented something new, or not new but not offered all that often.  Things like, "Is that cheese on top?" and "What is that white stuff?"

Hubby became exasperated with the last "What is in meatloaf?" (mostly because he himself has no idea what is in a meatloaf) and answered, "There's meat and there's loaf.  Just eat it."

Aaaaaaand we have our answer.

While on the subject of meatloaf, if you ever make it, I have a tip for you.  While I love a good meatloaf, I rarely made it, seeing as how I didn't have an hour and a half to let it cook.  This time, I had the brilliant idea of cooking it in a different pan.


Introducing, the mini-loaf pan.  Delicious meatloaf takes only 35 minutes or so to cook.

You're welcome.

For Considerer, the recipe. 

2 pounds ground meat (This time I used a pound pork from our pigs and one pound of beef from my brother's cattle.)
2 eggs
bread crumbs- maybe a cup-I don't measure
1 pkg of dried onion/mushroom (I think) Lipton soup mix
ketchup - once again, I don't measure-maybe a cup

Use your hands to mix it all together and put it in the pan.

And that is why I don't have a food blog.

Have a lovely day!

Tuesday, April 9, 2013

Ham and Bean Soup

We raise pigs for meat.  Occasionally for the local coyote population, but mostly for ourselves and a few friends.  I never knew how good pork could be until we started this little endeavor.  I've learned all sorts of things about different cuts and how to cook these delights.

For example, ham steaks are THE BOMB when grilled, as long as you don't overcook them.

Sausage gravy?  Yum.  And easy.  (Could have done a post on G day for that one, but my dad would have complained about too many recipes in one week.  Sorry.  Maybe another day.  Blame my dad.)

Bacon is best cooked in the oven.  Seriously.  Crisp bacon with no danger of splashing yourself with grease.

But the best discovery I have made is the ham hock.  I know it sounds awful, but that little bit of the pig leg makes some mean soup.  If you can get it from your butcher, do so now.

I know, they look scary.  Trust me.


If you can't get good ol' country ham hocks, this recipe works with any bone-in ham.  I first fell in love with this soup when my dad made it with store-bought ham after Easter.

Ingredients:

1 Tbsp. or so of vegetable oil
small onion - diced
ham hocks (or other bone-in-ham) I usually use about four or five hocks.  (I cannot bring myself to use the actual hoof.  I have my limits.)
large jar of Great Northern beans

The how-to:

In a stock pot/Dutch oven type pot, heat your oil a bit. 

Add the onion.

Try not to burn the onion while you take photos of the ham hocks.  Just sayin'. 

Once the onion has softened (takes just a minute or so), add the beans.  I then use tap water to rinse the jar and get all the beans out.  Add that water to the pot for a little extra liquid.

Place the ham (still on the bone) in the pot with the beans.

Let simmer for 30 minutes or so.

Trust me.

After 30 minutes, while the soup continues to simmer, take each hock out one at a time and remove the meat from the bone.  Chop up the meat and put it back in the pot.  Discard the bones.

Yes, I do have cutting boards.  I just rarely use them.

And you're done.

I like to serve it with some warm cornbread.

Dishes that match are optional.  Clearly.

This recipe will feed 2 adults, 2 growing boys who love it, 2 kids who kinda like it, and 2 little boys who refuse to try it.  There will be no leftovers.

 Have a lovely day!

Wednesday, April 3, 2013

Cut-Out Cookies with Children

Since our kitchen was all torn up through the entire month of December, we didn't get to make any Christmas cookies. 

Very sad, I know.

So, the kids and I decided to buy some new cookie cutters and make some festive Easter cookies.

If you would ever be so "lucky" as to make cut-out cookies with six children, I have some tips for you.  I did not include a recipe, because honestly, there have got to be better ones out in the land of allrecipe and pinterest. 

The italics portions are the kids' two cents.

1.  Make the dough without them.  The cutting, baking, and decorating will be more than enough together time.  Don't feel guilty about starting the process without them.  We don't mind that you made the dough without us, but was it really necessary to lock us out of the house in order to do so? 
Yes.  Yes it was.

2.  When the dough is ready, gather all of your materials before you call the kids into the kitchen.  Make sure you divide the dough into equal parts, one for each child, then get a "station" ready for each of them.  You may want to invest in more than one rolling pin.  Or not.  It's called "learning patience".

3.  Let the kids do the work.  Demonstrate how to roll out the dough, then hand over the rolling pin.  You might want to make sure they have a sufficient amount of flour, seeing as how the dough sticks to everything.  We had to start over 5 times before we could get the cut cookies off of the counter intact.  I think that has more to do with the lack of attention to the demonstration than the lack of flour. 


Like I said, let the kids do the work.  They'll figure it out.


4.  After you make (or open the can of) frosting, separate the white icing into separate bowls to mix up a variety of colors.  Make sure you have one color for each child.  It's helpful to also make frosting in colors that match your shapes.  If you give us a cookie in the shape of a carrot, we'd appreciate it if you had some orange frosting available.   Well, that wouldn't be very creative, now would it?  (I did whip up some orange.  They were about to mutiny.)

5.  Demonstrate how to frost a cookie.  I would highly suggest keeping the cookies on the counter/table while being frosted.  There will be a much better chance of keeping the cookie intact.


6.  If you're feeling really adventurous, give them some sprinkles to add a little bling to their cookies.


7.  Leave the kids alone.  It is hard sometimes, but don't touch and don't give opinions.  Let them create all on their very own.


If the kids are in the kitchen, your goal cannot be to create perfection.  The goal is to give the kids a chance to have fun, learn some new skills, and gain some self-confidence.  They can't do that if you're hanging over their shoulders telling them what to do.

Just go into the experience knowing there will be a big mess and knowing the rabbit will probably not look like a rabbit.  It's all good.  Don't eat Cuckoo's cookies.


Agreed.

Three letters down, 23 to go!

Not a C word, but I just found out my story is part of a series called HerStories.  It is a series Jessica Smock and Stephanie Sprenger have started, and they have found some wonderful contributors.  I'm honored to be featured today at School of Smock, where I tell the story of my very best friendship of my life. 

Have a lovely day!

Sunday, March 3, 2013

He's Not the Worst Cook in America

For the five years before Hubby and I walked down the aisle to proclaim, "I do!" we lived in separate states. We went to different colleges, and he was a year ahead of me, so our actual time together was limited. We didn't really know too much about each other's habits and ways of living.  But, both being the oldest children of divorced parents, we went into marriage very logical-like.  On our honeymoon we actually discussed the chore breakdown for our household.  The rules started the first day we got home.  A few of those rules have lasted all of these 18 years, and one has been used every day of our married lives.

When one person cooks dinner, the other one cleans the dishes.

When I married Hubby, the man thought that 3 pounds of ham was a complete meal.  I knew that if I wanted to eat like a normal human being, I would have to be the one to cook, and he had to be the one to clean the dishes.  This arrangement has worked out well for us all of these years.

Until yesterday, apparently.

When I left to take Buttercup to a volleyball game, I told Hubby to take whatever he wanted out of the freezer for dinner.  I would make it after the game.  When I got home, he had pork tenderloin chops thawing and a plan for how to make them.

Me:  Where did you learn how to make pork chops?
H (after some denials and diversions): allrecipes.com
Me:  Are you making the entire meal or just the pork?
H:  If you feel you need potatoes, I wouldn't object.  Or if you have a hankerin' for a green veggie, be my guest.

The expectations were set.  He was going to make pork chops, I was going to make everything to go with them.  You know, because we aren't wolves.

I give you Hubby's exact method for making breaded pork tenderloin.  The crossed out directions are the ones he did first, then amended later.

1.  Use a tenderizer hammer thing to pound out your pork tenderloin.  Make sure you put the tenderloin on a large, plastic cutting board. 


Buttercup (who was standing nearby): Dad!  You just splashed me with pork blood!

1a.  Make sure you cover the pork with plastic before you pound it.

Me:  Honey, is there a reason you need to put the pork on the cutting board?
H:  I don't want to break the counter.
Me:  First of all, the counter is stone, you won't hurt it, and second of all, do you actually miss the pork when you swing at it?

1. Wrap your pork chop in plastic wrap and pound it out with a tenderizer hammer thing.

2.  Heat oven to 350 degrees.

3.  Put eggs and milk in one shallow pan, bread crumbs and seasoning in another. 

4.  Pour every drop of oil you have into a big pan and heat it up.

Me:  Honey, are you supposed to be deep-frying the pork?
H:  I am supposed to brown it in oil.  How do I know when the oil is hot enough?
Me:  Let's go back to the amount of oil.  Deep-frying isn't usually a good thing to do in a 12-in. frying pan.  Are you sure you have the right amount of oil?
H (checking his phone):   Um, no.  I didn't see that part in the ingredients.  I'm supposed to use one tablespoon.  How in the world does that work?  Now what?
Me:  Let the oil cool and then pour it out. 
H:  But I need the pan!
Me:  How 'bout you put the oil in something to cool?  And back to your other question, you are simply browning it.   The oil is only supposed to coat the bottom of the pan.


4.  Read the list of ingredients and all directions before you begin.

5.  Once your one tablespoon of oil is hot, dip a chop in the egg, dredge it in the bread crumbs, then place it in the pan to brown.


6.  Check the chops often to make sure the chops are browning, not burning.

Me:  Honey, quit touching them.  They won't brown correctly if you keep fussing with them.
H:  Then how will I know if they're brown?
Me:  It will take more than 25 seconds.  Give them at least 2 minutes.
H:  Should I cover them?
Me:  Does the recipe say to cover them?
H:  No.
Me:  Then don't cover them. 

6.  Flip the chops after a few minutes (when the first side is brown).  Once they are browned completely, take them out and put them...

H:  It says I need to line a 9x13 pan with tin foil.  What does that mean?
Me:  Tear off a piece of tin foil, lay it in the bottom of a 9x13 pan.
H:  Do they have to be in one layer?  What if they don't fit?  And then it says cover it with more foil. 
Me:  We have more than one 9x13 pan.  Cover them with foil.

in a pan or two lined with foil.

7.  If you forget to do the egg/bread crumb thing, pretend that you did it on purpose in case someone doesn't like breading.


H: Why doesn't it look like the oven is on?
Me:  Because it's not.
H:  I pushed 350!
Me:  Did you push start?

2.  On the oven, set the temperature to 350, then PUSH START to get it to actually heat up.

8.  Once all of the pork is done and in the foil-lined 9x13 pan, mix the leftover egg and bread crumbs.  Fry them up.  This, according to my recipe, is called extra breading.  I call it scrambled eggs with a little bit of filler.


9.  Throw the eggs on top of the pork chops,


 then cover the whole thing with foil.

Me:  I don't have rose-colored glasses to make this all look better, but I do have roses.  Everything looks better with roses.  (Hubby picked some up for me on his way home from work on Friday.)
10.  While the pork is baking, do something with that oil you didn't need. 

H:  Honey, do we have a funnel?


H:  How do I know when it's done?
Me:  We have a meat thermometer.  Use it.

9.  When the pork reaches the proper temperature, remove from oven and enjoy.


We enjoyed.  The chops he pounded thin enough were delicious.  There were a few that were too thick and not quite right. 

In case you're wondering, I did the dishes he used to make the pork while the pork was cooking.  After we ate, he washed the ones I used to make the side dishes.

Perfect.

As I am writing this, Buttercup is making some cookies to take to school tomorrow.  She just came into the room and said, "The recipe says I need one and three fourths eggs.  How do I do that?"

Probably not a good time to pull out the "ask your father" card.

Have a lovely day! 

Monday, February 4, 2013

There May Not Be Drinkin', But There's Pukin'

It's Super How Many Variations of Cheese/Carbs Can We Eat Bowl!!!


I'm not kidding about the cheese and carbs.  The menu for this year's little family Super Bowl party tradition:


mozzarella bites
cheese and crackers
french bread pizza
nachos
soft pretzel bites
banana bread


cheese curls
french fries
spray cheese (you'll see why later)
Rice Krispie Treats
and the Cub Scout cake we won paid dearly for, in more ways than one (you'll see how later)

We always have to way overpay for the cake we purchase.  We are known to bid up the price of the cakes grandparents are required to buy for their grandkids.  Turn around is fair play and all that jazz. 

In order to try to give at least a semblance of balance, I add some protein and nutrients in the form of deviled eggs, homemade chicken nuggets, cut up veggies and fruit, and some summer sausage with the cheese and crackers.

Some kids do well and heed their wise mother's advice to eat some healthy food and refrain from stuffing yourself.  Most kids.


But there is always one who thinks he can handle the unlimited junk bar.  And we all have to pay for it. 

And so a new family rule has been written:

If you feel yourself getting full, then DO NOT eat a piece of cake with red icing.

Hubby was just a touch horrified that I took a photo when our child had just thrown up.  I already had the camera facing that way taking a photo of Giant when the puker ran through.  There was no thought involved.  Simply instinct.
It does not lead to an easy clean up.

Buttercup added her own addendum to the rule.

If you are going to puke, don't come towards me.

Moving on to other gross, vomit-inducing topics.

Hubby can't just let us watch a sporting event.  There always has to be some sort of prize or reward for the fans who correctly choose the winners.

This year, it was spray cheese.

Each time a team scored, the fans of that team were the proud recipients of a big old spray of cheese right into their mouths.  I can't believe we didn't have more vomit.


Thoughts on the halftime show:

I'm not a fan of Beyonce.

Thoughts on the power outage:

Hilarious.

We got to witness cutting-edge reporting we don't normally see outside of election years.

And while those players were just lazing around and the commentators were tripping over themselves trying to figure out how many times they could just show replays was too many, did you see who was continuing to work their tails off?  Just like they always do.

Their new motto should be "Neither rain, nor snow, nor death of night, nor power outage can keep us from our duty.

Yup.  Those cheerleaders never stopped shaking their money-makers throughout the 34 minute delay.  Dedicated to their craft, they are.

Although, the graphics guys did get to put in some overtime.  It's not often that they get to make new stat graphics on the fly.  "Yards since power outage", "points since power outage", "Beers chugged since power outage"... So many new graphics.

Thoughts on the commercials:

Fast and Furious 6?  Is that  really necessary?  After this many years I'm guessing it's less fast and furious and more quick and a touch angry.

Jared has been a spokesperson for Subway for 15 years???  My word, I am old.  I remember when his commercials first aired.  He lost all the weight while at IU in Bloomington during the same years we were there for Hubby to attend law school.  Good gravy, that was 15 years ago??

The E*trade baby is always good for a laugh.

Mio Fit made me giggle.  Especially the line "We didn't like the shape of a chicken, so we changed it to nuggets."

I want to be like the Taco Bell Nursing Home Residents when I grow up.

It may not have been funny, but Dodge Ram made a great commercial with "God made a farmer".

Miracle Montana Stain was quite funny.

Leon Sandcastle had all of us cracking up.

Thoughts on the kids watching the game:

There were too many "Kids, close your eyes" moments.  Why, oh why, can't football and sex be separated?

We never let the kids stay up for the entire game.   The little ones always get sleepy


and head to bed at halftime.

We sent the older kids to bed after the third quarter, but right afterwards the score got within 2 points.  (Remember, 'cause of the power outage?)  We called the boys back downstairs, as I did not want to be that mom.  `Can you imagine if the 49ers would have won, and my boys would have gone to school and said, "Yeah, we didn't see it.  Our mom made us go to bed after the third quarter"?  I'm mean, but I'm not cruel.

Did you watch the game?  Any thoughts to add?

Have a lovely day!

Tuesday, October 2, 2012

Best Macaroni and Cheese Ever

There is nothing like a heaping spoonful of macaroni and cheese on your plate.  Put simply, mac and cheese is comfort food at it's finest.   While I do enjoy some blue-boxed Kraft every once in a while, a good homemade mac and cheese makes me feel all warm and cozy.  Finding the right recipe has been tricky, though.  I thought it was darn near impossible to make a creamy mac and cheese without Velveeta, but friends, have I got a recipe for you.

I found it in a magazine, but it was so long ago that I don't remember which magazine it was.  Probably Family Circle.  Who knows?  Who cares?  All I know is that it is fantastic, and I'm willing to share it.  Even my mom, who has sworn her entire adult life that she doesn't like macaroni and cheese had two helpings of it when I made it for her. 

Just so you know, I am not a good cook.  I am a good follower of directions.  Give me a recipe, I can make something yummy.  Give me a bunch of ingredients and tell me to create something, I'll starve.  When I say I've tweaked the recipe, it's not because I thought it would taste better.  It's because I didn't have the ingredient and just left it out.

And lastly, before we get to the best mac and cheese recipe you've ever seen, I'll tell you that I have changed a few of the directions.  Not because they were unclear, but because the yahoos writing this paid no attention to the number of dishes they were using to make it.  I am always conscious of the number of dishes I am using, making sure Hubby doesn't have to wash any dishes that are unnecessary.  (Yes, you read that right.  The day after we got married, we discussed the distribution of chores.  Whoever cooks doesn't clean.  I always cook, because I hate to clean.) 

Finally, the recipe.  I will give you the directions from the recipe, then in italics you will find the things I do to keep the dirty dish count down.  You will need:

1 box (1 pound) penne rigate
3/4 pound sharp cheddar cheese, shredded (I use 2 cup package of Kraft shredded.)
1/2 pound Gruyere cheese, shredded (I forgot to check the package before I wrote this, but I do believe I use only half of this amount.)
1/2 cup Parmesan cheese, shredded
3 Tbsp unsalted butter
3 Tbsp all-purpose flour
2 cups milk (I use skim.)
1/2 tsp onion powder
1/2 tsp salt
1/8 tsp cayenne pepper (This would be a tweaked item.  I've never used it.)


Heat oven to 350.  Coat a 2-quart broiler-safe oval baking dish with nonstick cooking spray.  Bring a large pot of lightly salted water to boiling.

I only own one large pot, so I use a medium pot for the penne.  I save the large pot for the cheese sauce.  That way only one pot gets cheesy and hard to wash.
I don't spray the dish until later.  Instead of shredding on a plate or cutting board, I shred it in the baking dish.  Shred the Gruyere and Parmesan into the dish, mix them up a bit, and save for later.


Once water boils, add penne.  Cook 6 minutes then drain.  In a large bowl, toss together the cheddar, Gruyere and Parmesan.  Set aside.

As for the penne, duh.  And I've never actually timed 6 minutes.  As for the bowl and cheese, we've gone over that.  Mix just the two cheeses, leave the cheddar in the bag for now.

Melt butter in medium-size saucepan over medium heat.  Whisk in flour until smooth and slightly bubbly.

I used the large pot instead of the medium saucepan.  I do believe we are making what is called a roux.


In a thin stream, whisk in milk.  Stir in onion powder, salt, and cayenne.  Bring to a boil over medium-high heat.  Reduce and simmer 3 minutes.  Remove from heat; whisk in 2 1/2 cups of the cheese mixture.

I do all of this, except no cayenne and I don't measure the cheese.  I just use half of the cheese, the two that I shredded into the baking dish, and half of the package of cheddar. 


The half of the cheese that I don't put into the pot, I put into the cheddar bag.  Easy, no-mess way to mix all three cheeses together and set aside to use in a minute.  NOW spray the baking dish.


In pasta pot, stir together the cooked penne and the cheese sauce.

Or pour the pasta into the cheese sauce in order to avoid washing two cheesy pots.


Pour half of the mac and cheese into the baking dish.  Sprinkle with a generous cup of the shredded cheese.  Spoon remaining penne into dish and top with remaining cheese.

By generous cup, they mean half of the leftover shredded cheese.  We're just layering here. 


Bake at 350 for 20 minutes.  Increase oven temperature to broil and cook 3 minutes, until top is lightly browned.  Cool slightly before serving.

One other thing about me, I seem to have a touch of ADD.  Apparently, this is the first time that I made it to the bottom of this recipe.  I have never, ever broiled the mac and cheese.  I have simply baked it for 25 minutes or so.  Until it looks good :)


Oh, and it is good.  Trust me.

Have a lovely day!